
JUnit 테스트코드와 TDD 적용하기
1. TDD와 테스트코드 작성의 목적
- 테스트 주도 개발(Test Driven Develop)
- 목표에 맞는 테스트를 먼저 설계 및 구축한 후 테스트를 통과할 수 있는 코드를 짜는 순서로 개발을 진행하여 코드 설계 시 원하는 목표와 구현이 명확해짐.
-
테스트코드 작성을 하게 되면
- 코드의 안정성을 높일 수 있고, 해당 코드를 수정하는 과정에서 발생할 수 있는 Side-Effect를 줄일 수 있음. (해당 메서드를 다른 곳에서도 사용하고 있다면, 다른 메서드에서도 결과값이 달라질 수 있기 때문에 테스트코드를 통해서 Side-Effect를 확인할 수 있음)
- 생각해볼 내용
- 과연 TDD가 실무에서 얼마나 효율, 효과적일까?
- 첫째로, 목표가 바뀌지 않는 개발환경이 있을까?
- 둘째로, 개발 후에 수정이 필요한 경우, 결국 Test코드를 다시 다 수정해야 하는 번거로움이 여전히 발생한다.
- 셋째로, 테스트 코드 또한 개발자 본인이 작성하는 경우가 많은데, 과연 내 인지 안에서 예측하지 못했던 오류를 걸러낼 수 있을까? (현재는 실력이 모자라기 때문에 로직이 잘 구현 되었는지를 확인하는 용도로도 충분한 가치가 있지만 말이다)
2. JUnit
-
Java진영의 대표적인 Test Framework.
-
단위테스트를 위한 도구 제공
- 모든 메서드에 대한 각각의 테스트 케이스를 작성하는 것.
-
어노케이션 기반으로 테스트 지원
-
Assert로 기대값에 대한 수행 결과 확인
-
SpringBoot 2.2버전부터는 JUnit5 ver.이 기본적으로 내장되어 있음.
-
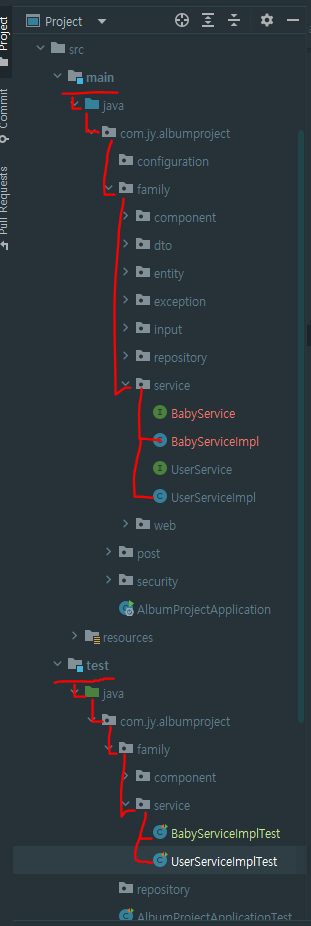
테스트를 위해서는 코드가 같은 경로에 있어야 함.
-
‘Ctrl + Shift + T’로 Test class 생성 가능.
-
- JUnit LifeCycle Annotation
| Annotation | Description |
|---|---|
| @Test | 테스트용 메서드 표현 |
| @BeforeEach | 각 테스트 메서드가 시작되기 전에 실행되어야 하는 메서드 표현 |
| @AfterEach | 각 테스트 메서드가 시작된 후 실행되어야 하는 메서드 표현 |
| @BeforeAll | 테스트 시작 전 실행되어야 하는 메서드 표현 (static 처리 필요, BeforeEach 전) |
| @AfterAll | 테스트 종료 후 실행되어야 하는 메서드 표현 (static 처리 필요, AfterEach 후) |
| @DisplayName(“”) | 테스트 시 어떤 내용에 대한 테스트인지 표현 |
| @Disabled | 테스트를 실행하지 않게 설정 |
- JUnit Main Annotation
-
@SpringBootTest- 통합 테스트 용도로 사용됨.
@SpringBootApplication을 찾아가 하위의 모든 Bean을 스캔하여 로드함.- 그 후 Test용 Application Context를 만들어 Bean을 추가하고, MockBean을 찾아서 교체.
-
@ExtendWith-
JUnit4 에서
@Runwith로 사용되던 것. -
메인으로 실행될 Class를 지정할 수 있음.
-
@SpringBootTest는 기본적으로@ExtendWith가 추가되어 있음.@ExtendWith(MockitoExtension.class) class BabyServiceImplTest { }
-
-
@WebMvcTest(Class명.class)-
괄호 안 클래스만 실제로 로드하여 테스트.
-
컨트롤러 관련 코드만 테스트할 경우
@SpringBootTest대신해서 사용. -
매개변수를 지정해주지 않으면 컨트롤러와 연관된 Bean이 모두 로드됨.
@WebMvcTest(UserController.class)
@AutoConfigureMockMvc(addFilters = false)
@DisplayName("UserController 테스트")
class UserControllerTest {
}
-
-
@Autowired about Mockbean-
Controller의 API를 테스트하는 용도인 MockMvc 객체를 주입받음.@Autowired private MockMvc mockMvc; -
perform()메서드를 활용하여 컨트롤러 동작을 확인.andExpect(),andDo(),andReturn()도 같이 활용.
mockMvc.perform( post("/user/register") .content(userInputJson) .contentType(MediaType.APPLICATION_JSON)) .andExpect(status().isOk()) .andDo(print());-
perform()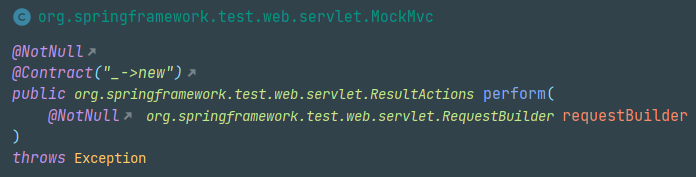
-
MockMvc 객체가 수행하는 메서드.
-
Parameter:
RequestBuilderget(),post(),put(),delete()등 가능.
-
Return:
ResultActions인터페이스andExpect(),andDo(),andReturn()가능.
-
-
andExpect()-
Parameter:
ResultMatcher. -
체이닝 방식으로 사용 가능하며, 예상값을 검증할 때 사용.
.andExpect(status().isOK())
.andExpect(content().contentType("application/json;charset=utf-8"))
.andExpect(jsonPath($.message").value("error"))
-
-
andDo()-
요청에 대한 처리를 함.
-
print()메서드가 일반적임. 처리 결과를 출력해줌.andDo(print())// 요청에 대한 처리 예시 MockHttpServletRequest: HTTP Method = POST Request URI = /user/register Parameters = {} Headers = [Content-Type:"application/json", Content-Length:"245"] Body = <no character encoding set> Session Attrs = {} Handler: Type = com.jy.albumproject.family.web.UserController Method = com.jy.albumproject.family.web.UserController#representativeRegister(UserInput) Async: Async started = false Async result = null Resolved Exception: Type = null ModelAndView: View name = null View = null Model = null FlashMap: Attributes = null MockHttpServletResponse: Status = 200 Error message = null Headers = [Content-Type:"application/json"] Content type = application/json Body = false Forwarded URL = null Redirected URL = null Cookies = []
-
-
andReturn()-
테스트 클래스에서 작성은 안했지만 테스트한 결과 객체를 받을 수 있음.
-
Return값은
MvcResult로 받음.MvcResult result = mockMvc.perform( get("/")) .andExpect(status().isOK()) .andExpect(model().attributeExists("serverTime")) .andDo(print()) .andReturn();
-
-
ArgumentCaptor<>- 메서드 동작 시 매개변수의 상태를 캡쳐하는 것. 값을 비교할 때 쓰일 수 있음.
mockMvc.perform( post("/user/register") .content(userInputJson) .contentType(MediaType.APPLICATION_JSON)) .andExpect(status().isOk()) .andDo(print()); ArgumentCaptor<UserInput> captor = ArgumentCaptor.forClass(UserInput.class); verify(userService).representativeRegister(userInput); verify(userService, times(1)).representativeRegister(captor.capture()); assertEquals(captor.getValue().getPhone(), userInput.getPhone()); System.out.println(captor.getAllValues());- 여러개도 사용 가능.
-
참고자료: MockMvc Doc
-
-
@MockBean-
테스트할 클래스에서 주입받고 있는 객체에 대해 가짜 객체를 생성해주는 어노테이션.
@MockBean private UserServiceImpl userService; @MockBean private FamilyRepository familyRepository; @MockBean private UserRepository userRepository; -
해당 객체는 실제 행위를 하지 않음.
-
대신
given()메서드 활용하여 가짜 객체의 동작에 대해 정의.
-
-
@AutoConfigureMockMvc- spring.test.mockmvc의 설정을 로드하면서 MockMvc의 의존성을 자동으로 주입.
- MockMvc클래스는 REST API 테스트를 할 수 있는 클래스.
@WebMvcTest(UserController.class) @AutoConfigureMockMvc(addFilters = false) @DisplayName("UserController 테스트") class UserControllerTest { }- 스프링 시큐리티를 함께 사용하는 어플리케이션에서는 addFilters를 false로 두고 해야 시큐리티에서 걸리는 것이 없음.
-
@Import- 필요한 class들을 Configuration으로 만들어서 사용 가능.
- Configuration Component 클래스도 의존성 설정을 할 수 있음.
- Import된 클래스는 주입으로 사용 가능.
@WebMvcTest(UserController.class) @AutoConfigureMockMvc(addFilters = false) @Import(MailComponents.class) @DisplayName("UserController 테스트") class UserControllerTest { } -
의존성 추가
testImplementation 'org.springframework.boot:spring-boot-starter-test'
- *Spring Security 어플리케이션의 Controller Test
-
Principal세션에서 유저권한 가져오기 예시@Test @DisplayName("회원정보 조회 - 성공") void detail() throws Exception { //given User user = new User(userEntity.getPhone(), userEntity.getPassword(), AuthorityUtils.createAuthorityList("ROLE_USER", "ROLE_REPRESENTATIVE")); TestingAuthenticationToken testingAuthenticationToken = new TestingAuthenticationToken(user,null); //when mockMvc.perform( get("/user/detail") .principal(testingAuthenticationToken)) .andExpect(status().isOk()) .andDo(print()); ArgumentCaptor<String> captor = ArgumentCaptor.forClass(String.class); //then verify(userService).detail("01012345678"); verify(userService, times(1)).detail(captor.capture()); assertEquals(captor.getValue(), "01012345678"); }org.springframework.security.core.userdetails의User클래스로 User를 생성.TestingAuthenticationToken으로 유저 정보 담기.- get(), post() 메서드 뒤에
.principal(testingAuthenticationToken)으로 시큐리티 통과시키기.
-
@WithMockUser어노테이션 사용- Mock유저를 사용하여 테스트 진행. 단, 이때는 Default값이
username = "user",password = "password",role = "ROLE_USER"임. - 변경을 하고 싶으면 어노테이션 뒤에 (
username =,password =,role =)을 붙여주면 됨.
@Test
@WithMockUser(username = "01012345678", password = "testPassword")
void test() {
   mockMvc.perform(
          post("/baby/add")
              .content(babyInputJson)
              .principal(testingAuthenticationToken)
              .contentType(MediaType.APPLICATION_JSON))
          .andExpect(status().isOk())
          .andDo(print());
}
// andDo(print())시 MockHttpServletRequest에 담기는 내용. MockHttpServletRequest: HTTP Method = POST Request URI = /baby/add Parameters = {} Headers = [Content-Type:"application/json", Content-Length:"121"] Body = <no character encoding set> Session Attrs = {SPRING_SECURITY_CONTEXT=SecurityContextImpl [Authentication=UsernamePasswordAuthenticationToken [Principal=org.springframework.security.core.userdetails.User [Username=01012345678, Password=[PROTECTED], Enabled=true, AccountNonExpired=true, credentialsNonExpired=true, AccountNonLocked=true, Granted Authorities=[ROLE_USER]], Credentials=[PROTECTED], Authenticated=true, Details=null, Granted Authorities=[ROLE_USER]]]} // Principal의 User객체에 username, password, Granted Authorities로 담긴다.@WithMockUser가 사용하는WithMockUserSecurityContextFaxtory
final class WithMockUserSecurityContextFactory implements WithSecurityContextFactory<WithMockUser> { public SecurityContext createSecurityContext(WithMockUser withUser) { String username = StringUtils.hasLength(withUser.username()) ? withUser .username() : withUser.value(); if (username == null) { throw new IllegalArgumentException(withUser + " cannot have null username on both username and value properites"); } List<GrantedAuthority> grantedAuthorities = new ArrayList<>(); for (String authority : withUser.authorities()) { grantedAuthorities.add(new SimpleGrantedAuthority(authority)); } if (grantedAuthorities.isEmpty()) { for (String role : withUser.roles()) { if (role.startsWith("ROLE_")) { throw new IllegalArgumentException("roles cannot start with ROLE_ Got " + role); } grantedAuthorities.add(new SimpleGrantedAuthority("ROLE_" + role)); } } else if (!(withUser.roles().length == 1 && "USER".equals(withUser.roles()[0]))) { throw new IllegalStateException("You cannot define roles attribute "+ Arrays.asList(withUser.roles())+" with authorities attribute "+ Arrays.asList(withUser.authorities())); } User principal = new User(username, withUser.password(), true, true, true, true, grantedAuthorities); Authentication authentication = new UsernamePasswordAuthenticationToken( principal, principal.getPassword(), principal.getAuthorities()); SecurityContext context = SecurityContextHolder.createEmptyContext(); context.setAuthentication(authentication); return context; } } - Mock유저를 사용하여 테스트 진행. 단, 이때는 Default값이
-
@WithAnonymousUser어노테이션- 무작위 유저로 테스트하는 경우 사용.
- 일부 메서드만 이렇게 테스트하고자 할때 유용.
-
@WithSecurityContext어노테이션- 직접
SecurityContext를 만들 수 있는 커스텀 어노테이션을 만들 수 있음. 이를 통해 CustomUser를 사용할 수 있음.
// WithMockCustmoerUser.java @Retention(RetentionPolicy.RUNTIME) @WithSecurityContext(factory = WithMockCustomUserSecurityContextFactory.class) public @interface WithMockCustomUser { String username() default "Test UserName"; String name() default "Test Name"; }- 직접
SecurityContextFactory도 구현해 주어야 함.
// WithMockCustomerUserSecurityContextFactory.java public class WithMockCustomUserSecurityContextFactory implements WithSecurityContextFactory<WithMockCustomUser> { @Override public SecurityContext createSecurityContext(WithMockCustomUser customUser) { SecurityContext context = SecurityContextHolder.createEmptyContext(); UserContext userContext = new UserContext(1L, "aabb", customUser.username(), customUser.role()); PostAuthorizationToken token = new PostAuthorizationToken(userContext); context.setAuthentication(token); return context; } }- 이렇게 만들었을 때의
@WithMockCustomerUser테스트
@Test
@WithMockCustomUser(role = "ROLE_ADMIN") // 내가 테스트하고자하는 role 입력
void methodName() {

}
- 직접
- 통합 테스트란?
- 여러 기능을 조합하여 전체 비즈니스 로직이 제대로 동작하는지 확인하는 테스트.
@SpringBootTest사용-
이 방법은 Springboot를 띄우고 모든 빈을 스캔하고 로드하는 작업을 반복하는 무거운 작업임.
-
예시) UserServiceImplTest.java
import static org.junit.jupiter.api.Assertions.assertEquals;
import static org.junit.jupiter.api.Assertions.assertThrows;
import static org.junit.jupiter.api.Assertions.assertTrue;

import com.jy.albumproject.family.dto.UserDto;
import com.jy.albumproject.family.entity.UserEntity;
import com.jy.albumproject.family.exception.UserPasswordNotEqualException;
import com.jy.albumproject.family.input.UserInput;
import com.jy.albumproject.family.repository.UserRepository;
import java.util.List;
import java.util.Optional;
import org.junit.jupiter.api.BeforeEach;
import org.junit.jupiter.api.DisplayName;
import org.junit.jupiter.api.Test;
import org.springframework.beans.factory.annotation.Autowired;
import org.springframework.boot.test.context.SpringBootTest;

@SpringBootTest
class UserServiceImplTest {

  @Autowired
  private UserServiceImpl userService;

  @Autowired
  private UserRepository userRepository;

  @BeforeEach
  public void init() {
  }

  @Test
  @DisplayName("대표유저가입 + 가족엔티티 자동생성")
  void mainUserRegisterTest() {
    //given
    String randomInt = Integer.toString((int)(Math.random()*1000000));
    UserInput userInput = UserInput.builder()
        .phone(randomInt)
        .password("1234")
        .username("홍길동")
        .familyRelationship("아빠")
        .email("test@gmail.com")
        .profilePath("/localhost:8080/")
        .build();
    //when
    boolean b = userService.representativeRegister(userInput);
    Optional<UserEntity> optionalUserEntity = userRepository.findByPhone(randomInt);
    //then
    assertTrue(b);
    assertEquals(optionalUserEntity.get().getFamilyEntity().getCreateDt(), optionalUserEntity.get().getCreateDt());
  }
}
- 단위 테스트란?
- 프로젝트에 필요한 모든 기능에 대한 테스트를 ‘각각’ 테스트하는 것.
- 일반적으로 스프링 부트에서는 ‘org.springframework.boot:spring-boot-starter-test’ 디펜던시만으로 의존성을 모두 가질 수 있음.
- F.I.R.S.T 원칙을 지키며 할 수 있도록.
- Fast: 빠르게 진행되어야 함.
- Independent: 독립적으로 테스트가 가능해야 함.
- Repeatable: 계속 같은 결과가 나와야 함.
- Self-Validation: 테스트 실행만으로 바로 결과를 확인할 수 있어야 함.
- Timely: 서비스 전에 테스트가 진행되어야 함.
-
예시) BabyServiceImplTest.java
import static org.junit.jupiter.api.Assertions.*;
import static org.mockito.ArgumentMatchers.any;
import static org.mockito.ArgumentMatchers.anyLong;
import static org.mockito.BDDMockito.given;
import static org.mockito.Mockito.times;
import static org.mockito.Mockito.verify;

import com.jy.albumproject.family.entity.BabyEntity;
import com.jy.albumproject.family.entity.FamilyEntity;
import com.jy.albumproject.family.input.BabyInput;
import com.jy.albumproject.family.repository.BabyRepository;
import com.jy.albumproject.family.repository.FamilyRepository;
import java.time.LocalDate;
import java.util.ArrayList;
import java.util.List;
import java.util.Optional;
import org.junit.jupiter.api.DisplayName;
import org.junit.jupiter.api.Nested;
import org.junit.jupiter.api.Test;
import org.junit.jupiter.api.extension.ExtendWith;
import org.mockito.ArgumentCaptor;
import org.mockito.InjectMocks;
import org.mockito.Mock;
import org.mockito.junit.jupiter.MockitoExtension;

@ExtendWith(MockitoExtension.class)
class BabyServiceImplTest {

  @Mock
  private BabyRepository babyRepository;

  @Mock
  private FamilyRepository familyRepository;

  @InjectMocks
  private BabyServiceImpl babyService;

  @Nested
  @DisplayName("아기정보 추가 메서드 테스트")
  class addBabyInfoMethod {
    BabyEntity babyEntity1 = BabyEntity.builder()
        .id(10L)
        .birthday(LocalDate.now())
        .babyName("아기이름1")
        .build();

    BabyEntity babyEntity2 = BabyEntity.builder()
        .id(11L)
        .birthday(LocalDate.now())
        .babyName("아기이름2")
        .build();

    FamilyEntity familyEntity = FamilyEntity.builder()
        .id(1L)
        .build();
    List<BabyEntity> babyEntityList;

    @Test
    @DisplayName("아기정보 추가 - 성공")
    void addBabyInfo() {
      babyEntityList = new ArrayList<>();
      babyEntityList.add(babyEntity1);
      babyEntityList.add(babyEntity2);

      //given: Mock 객체가 특정 상황에서 해야하는 행위를 정의하는 메서드
      given(babyRepository.findBabyEntitiesByFamilyEntityId(anyLong()))
          .willReturn((List<BabyEntity>) babyEntityList);

      given(familyRepository.findById(anyLong()))
          .willReturn(Optional.of(familyEntity));

      //when
      BabyInput babyInput = BabyInput.builder()
          .id(12L)
          .birthday(LocalDate.now())
          .babyName("아기정보추가")
          .build();
      boolean b = babyService.addBabyInfo(babyInput, familyEntity.getId());
      ArgumentCaptor<BabyEntity> captor = ArgumentCaptor.forClass(BabyEntity.class);

      //then
      verify(babyRepository, times(1)).save(captor.capture());
      assertEquals(captor.getValue().getBabyName(), babyInput.getBabyName());
      assertEquals(captor.getValue().getBirthday(), babyInput.getBirthday());
      assertEquals(captor.getValue().getFamilyEntity().getId(), familyEntity.getId());
      assertTrue(b);
    }

    @Test
    @DisplayName("아기정보 추가 - 실패 (중복)")
    void addBabyInfoFail() {
      //given
      babyEntityList = new ArrayList<>();
      babyEntityList.add(babyEntity1);
      babyEntityList.add(babyEntity2);

      given(babyRepository.findBabyEntitiesByFamilyEntityId(anyLong()))
          .willReturn((List<BabyEntity>) babyEntityList);

      /* 이게 있으면 필요없는 코드라 에러가 남
      given(familyRepository.findById(anyLong()))
          .willReturn(Optional.of(familyEntity));
       */

      //when
      BabyInput babyInput = BabyInput.builder()
          .id(12L)
          .birthday(LocalDate.now())
          .babyName("아기이름1")
          .build();
      boolean b = babyService.addBabyInfo(babyInput, familyEntity.getId());

      //then
      assertFalse(b);
    }
  }
}
마지막 수정일시: 2022-10-04 01:08
댓글남기기